If you have just switched to the new Windows 11, you will be surprised to see the plausible battery optimization done on the operating system. However, we use various kinds of software professionally. Not all these are immune to bugs, and some of them alter system settings causing heavy battery drainage and other system faults.
Moreover, if you are a laptop user and not near a power source, you need to know about crucial Windows 11 settings that can extend the battery life. Here, we will give you 8 essential tips to improve battery life on Windows 11.
Read: How to Disable Weather Widget on Windows 11
Tips to Improve Battery Life on Windows 11
1. Keep Your System Up-to-date
First and foremost, keeping your system up-to-date is the primary thing. Windows periodically release essential updates to keep your system smooth and immune to security and performance vulnerabilities.
If you don’t update your system regularly, then your system faces different issues that affect battery performance. So, updating to the latest patches permits your system to run more smoothly.
How to do it?
Step 1: Press Windows Key + I; it will open up Settings on your computer.
Step 2: Select Windows Update from the left panel.

Step 3: You will see an option labeled, Check for Updates. Click on it, and Windows will check for the latest updates for your system.
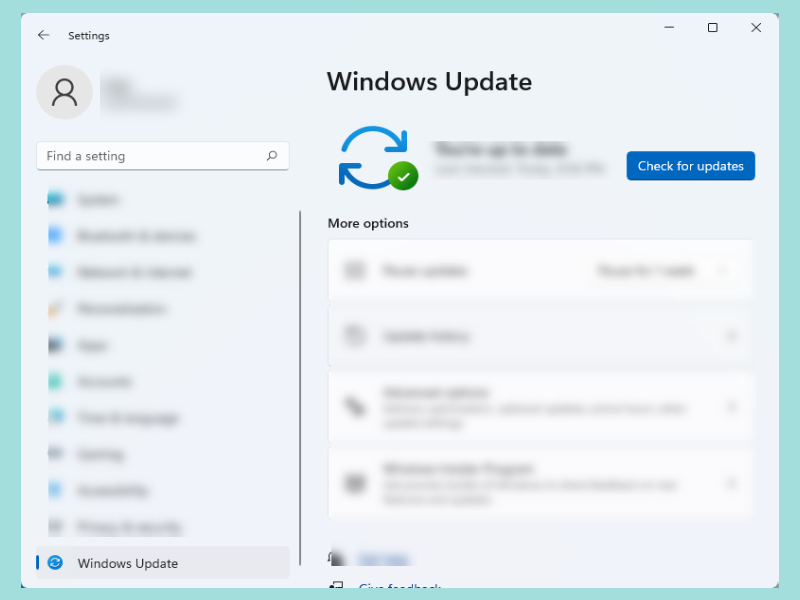
Step 4: If the update checker finds the latest improvements for your machine, go ahead and install them.
Also Read: How to Record Audio in Windows 11
2. Alter Display Settings
When buying a new laptop or assembling a new desktop, only few users talk about the quality of display. However, people into content creation or gamers lean towards having high resolution and brighter nits displays. But did you know that those displays are power-hungry? The brighter the panel, the more power it consumes.
So, adjusting screen brightness can be a viable option to improve your battery.
How to do it?
Step 1: Hit Windows Key + I, which will open up Settings.
Step 2: Select System from the left panel, and choose Display.
Step 3: Look for a bar under “Brightness” in the Display section. Adjust it to lower brightness.

Alternatively, laptop users can do it with shortcut keys. Although, it varies among manufacturers.
3. Use Battery Saver
A battery saver is a great feature to minimize battery usage and expand your system’s battery life. Windows 10 had these features, and Microsoft also added them in Windows 11. By activating the Battery Saver mode, your system will stop running background applications, turn off notifications, and, most importantly, lower the brightness. So, you will have a considerable amount of battery life.
Moreover, Windows provides an additional option to turn this automatically. So, when your battery reaches a certain percentage, your system will turn on the Battery Saver mode.
How to do it?
Step 1: Fire up Settings once again by pressing Windows Key + I
Step 2: From the System, choose Power & Battery.

Step 3: Click on “Battery Saver” to turn it on automatically.
Step 4: You can further customize this from “Turn battery saver on automatically at”. Here, you can select your desired battery percentage when you want to turn on Battery Saver.

4. Change App Background Activity
Windows lets several applications run in the background. Being feature-heavy, Windows 11 needs some (not all!) apps to run in the background. These apps pass on information within each other to contribute to good performance. However, these apps drain your battery very quickly. So, closing these apps’ background activities might improve the battery life.
How to do it?
Step 1: Go to Setting > System > Power & Battery.
Step 2: Next, go to the Battery Usage section, and look for the apps consuming battery by running in the background.

Step 3: Click on the vertical three-dot line beside an app, and choose “Manage background activity”.
Step 4: You can change its background activity by selecting “Power Optimized” or “Never”.

5. Use Hibernation Mode
Hibernating your system can help expand the battery life. Putting your laptop in Hibernation will result in low power usage. However, HIbernating your system will store your work and data in the local drive’s memory. So, when you take a break from work for some time, you can save battery life without shutting down your computer.
Additionally, you can do it by pressing the power button only. However, you need some tweaking that we elaborate on below.
How to do it?
Step 1: Type “Control Panel” in Start Menu and go to Power Options.
Step 2: Click on the “Change what the power button does” to see further settings.
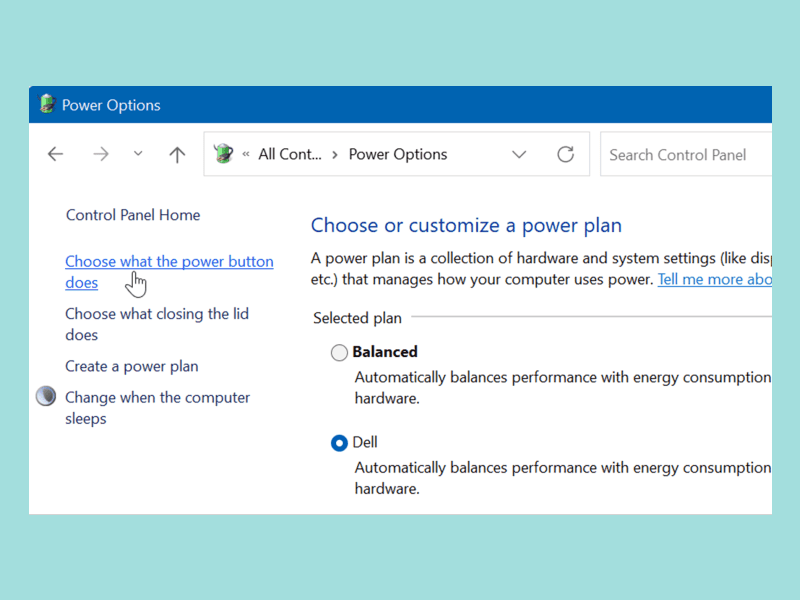
Step 3: You have to click on “Change settings that are currently unavailable”.
Step 4: A new section labeled “Shutdown Settings” will open where you will see the Hibernate option and a tick box right by it. Check it and click on save.
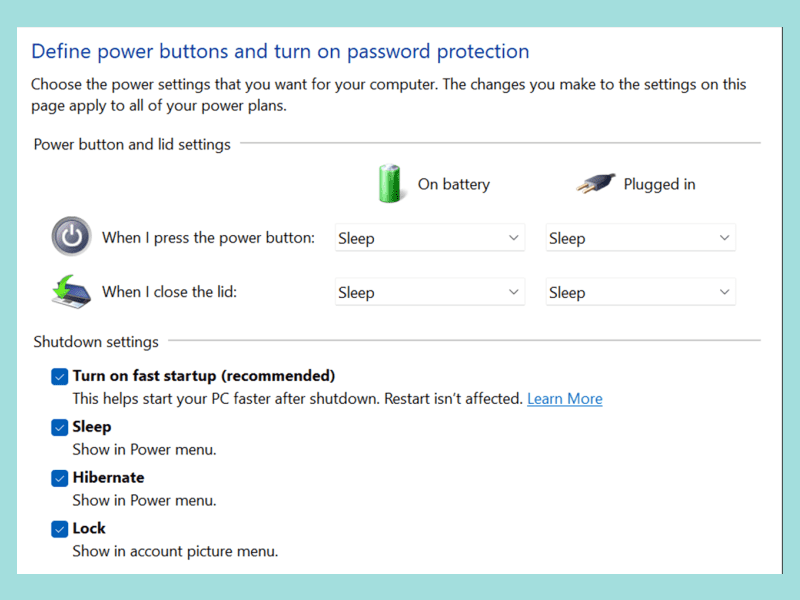
Step 4: Now, when you press the power button to Shutdown your computer, you’ll notice a new Hibernate option.
6. Change Power Modes
There are mainly three power modes available:
- Best Performance, where you can use all your system’s resources to do your work without worrying about battery life efficiently, draining a lot of battery.
- Best Power Efficiency stops unwanted apps running in the background and lower screen brightness while allowing sustained battery life.
- Balanced, the default mode, the mix of the other two.
How to do it?
Step 1: Open Control Panel.
Step 2: Go to Power Options. (switch to larger icons if you can’t find them)
Step 3: Then Change plan Settings > Change advanced power settings. Choose according to your usability scenarios and click Apply and Save.

7. Change the Action of the Closing Lid
If you are not using your computer but don’t want to shut it down for any ongoing task or download, closing the lid can save you a lot of power.
How to do it?
Step 1: Press Windows + R, type Control Panel, and Enter.
Step 2: Navigate to Power options > Choose what closing the lid.
Step 3: Modify the setting under “When I close the lid” and Done.

8. Turn off Display
We forget to close the lid when we go AFK most of the time! (Away From Keyboard). Our computer runs typically during these minutes/hours, draining a significant battery.
You can automatically set the timer to turn off the Display to overcome this.
How to do it?
Step 1: Press Win + I to open Settings.
Step 2: Go to System > Power & battery and expand “Screen and sleep”. Here, you can choose the duration when your Display turns off automatically after being in an inactive state. You can select the same or different settings for “Plugged in” and “On battery” modes.

Recommended: How to Change Refresh Rate in Windows 11
Wrapping Up
Windows 11 has plenty of options to adjust power consumption, and these are easy tweaks and don’t require you to be a technician. Simple changes in settings and competent usage help lower power consumption and improve battery longevity. If you want to know more tips about Windows 11, let us know!


")