It has been quite some time now that Discord gained such immense popularity as one of the best platforms for gaming communities to come together and communicate via voice and text completely for free. But, if you want to record these conversations, there isn’t any official way whatsoever to do so.
Using any third-party allocation, users can easily record these conversations. Just bear in mind, there are several instances where recording such conversations without any consent might deem illegal. Make sure you have taken all the necessary permissions before proceeding forward.
So, in this article, we are going to discuss some of the tried and tested methods to record discord audio. Configure your microphone and other channels accordingly and let’s get right down to it.
Also read about, best discord bots, share screen in discord, and useful MEE6 commands.
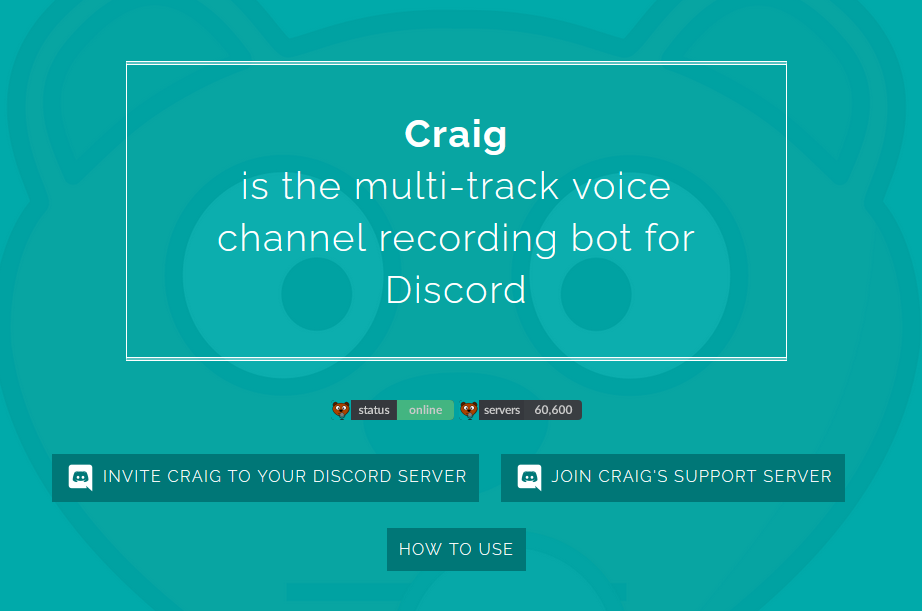
Record Discord Audio Using Craig Chat Bot
For anyone who is operating their Discord version, it is very easy to set up your Craig chat bot and record discord audio accordingly. Once the Craig bot sits on your chat server, you can easily invite users to the voice chat room and record conversations accordingly.
When it comes to the legality of recording, Craig chat bot makes sure to abide by the same as well. This means, once it starts to record, it is indicated by a visible label within the chatroom. Craig chat bot also comes with some unique functionalities as well, including the ability to record each user with individual audio tracks.
This is something that can surely come in handy while making specific cuts and whatnot. To use the Craig chat bot, follow the steps down below:
Step 1
Before using Craig, make sure you invite the bot to your server. To do so, simply head over to the Craig website. Now click on ‘Invite Craig to Your Discord Server’ to proceed further.
Step 2
Once you click on the link, it will bring you right to the Discord server authorization page. Before you start using Craig, make sure you give it all the permissions within the server. Click on ‘Add Bot To’ and select your server. Simply click on ‘Authorize’ to allow the bot to join.

Step 3
If you have successfully followed through the steps, you will be able to view the join message prompt for ‘Craig’ in your server. After this point, no further configuration is required whatsoever. You can go right away into recording via audio channels.

Step 4
Once Craig enters the channel, it would immediately start recording. After that, you can find the bot’s username changed. Along with that, you can also find an audio prompt saying, ‘now recording’ for confirmation.
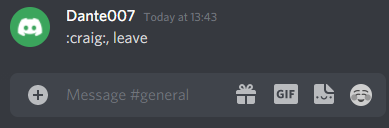
Step 5
To stop Craig recording, simply type in: ‘craig:, leave’. This, in turn, would force Craig to stop recording and leave the current channel. That being said, other channels would continue to record.
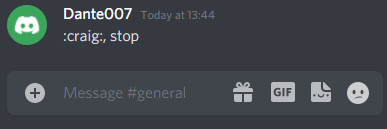
Step 6
To let Craig stop recording from all audio channels, type in: ‘craig:, stop’. This way you can end recording in all channels. This is also an effective way to stop recording a single channel if you use the leave command.
Step 7
As soon as Craig starts recording, you will receive a private message for the download links of all your recordings as well.
Step 8
Craig offers one of the longest duration of recording time, 6 hours to be precise. For the streamer’s convenience, you can also choose the point in time to start recording.
Step 9
Head over to the Craig website, and you can find the full list of all Craig commands. For convenience you can also type in, ‘craig:, help’ to directly head over the website for all the list of commands.
Record Discord Audio Using OBS
The OBS Studio has made quite the name for itself within the world of gaming in Twitch and YouTube. And for the best, OBS is open-sourced and completely free to use streaming and recording application.
OBS also offers cross-platform functionalities with extensive support to Linux, Windows, and macOS. You can also follow through OBS Discord Server to learn more about OBS while clearing through your doubts whatsoever. That being said, here is a detailed guide on how to record discord audio using OBS.
Step 1
Right after opening OBS, make sure that your audio output is set to mp4. This, in turn, makes it very easy to work around with any audio studio including Audacity. To change output, go to Settings.

Step 2
Within the Settings windows, choose Output.
Step 3
Click on the drop-down box from Recording Format and select mp4. Now, simply click on OK.

Step 4
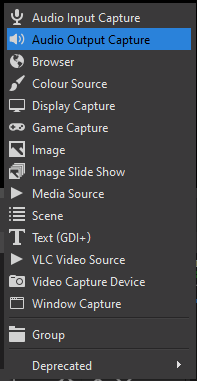
In order to record audio, simply go to the Source and click on the plus (+) sign.
Step 5
Now, click on Audio Output Capture and create a new source.
Step 6
By default, it is going to be set to Create new. Users can either rename it or simply keep it at default. Click on OK to create.

Step 7
Right after that, when the Properties window opens you can keep the settings at default. To proceed forward, simply click on OK.

Step 8
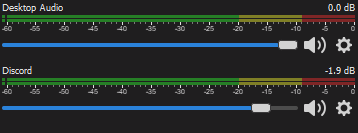
Now at the Audio Mixer, you can find a new source named Discord. You can also use the slider within the blue bar to adjust your recording volume accordingly. Use the speaker icon to simply mute and unmute your audio.
Step 9
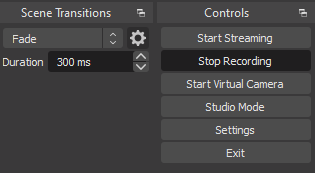
Simply click on Start Recording

Step 10
Right after your streaming is over, click on Stop Recording or Pause accordingly.
Step 11
Another prompt window will pop up, asking you to confirm to Stop Recording. Click on Yes to proceed further. And Viola! You can use your Discord audio recording on any social media platform.
Recommended: 8 Best Voice Changer Apps for Discord
The Bottom Line
So that was our curated guide on how to record Discord audio using both Craig Chat Bot and OBS. It all comes down to individual preference, so choose the one that works best for you. Let us know in the comment section below, which Discord how-to guide you want us to follow through the next.


")


")