If you want to take a quick snap of your entire display or capture a particular section of the screen, taking a screenshot is the only way to go. Right from using keyboard shortcuts to using the built-in tool, Windows 10 is packed with numerous ways to take a screenshot. That is why, we have curated this article, offering some of the easiest ways to take a screenshot on your Windows 10 computer.
Related: How to Record Your Computer Screen
5 Ways to Take Screenshot in Windows 10
How to Take a Screenshot in Windows 10
- Using Spinning Tool: You just have to open the spinning tool, click on the ‘New’ button and take screenshot of the desired area. Read more.
- Snip & Sketch: Search for Snip & Sketch in the windows search bar, click on it and then press Windows Key + Shift + S to take a screenshot. Read more.
- Print Screen: You can also press PrtScn or PrtSc key on your keyboard to screenshot in windows. Read more.
- Windows Key + Print Screen: An preferred way of taking screenshots where the file will be saved in Pictures folder. Read more.
- Game Bar: You can open Game bar by pressing Windows Key + G and click on screenshot button to a snap of your screen. Read more.
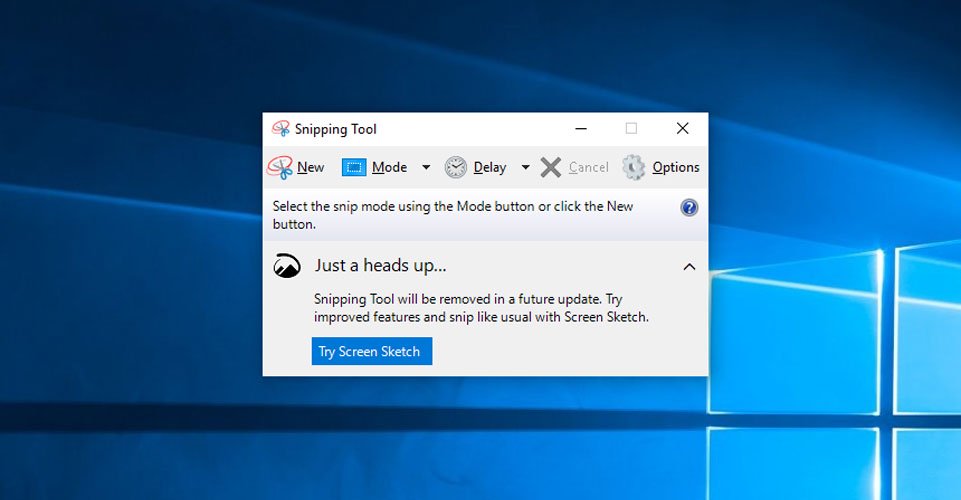
1. Snipping Tool
There’s hardly anyone who doesn’t know how to use Snipping Tool at this point. First introduced in Windows Vista, Snipping Tool is one of the legacy software Microsoft has kept in Windows 10. While Snipping Tool has been delisted in Windows 10 from the start menu, you can easily look for the same in the search bar.
Once you open Snipping Tool, select the “New” button in order to take the screenshot. The rectangular snip is set by default, but you can also capture the entire screen as well. The only downside is that you can choose the path where you want to save your capture your screenshot.
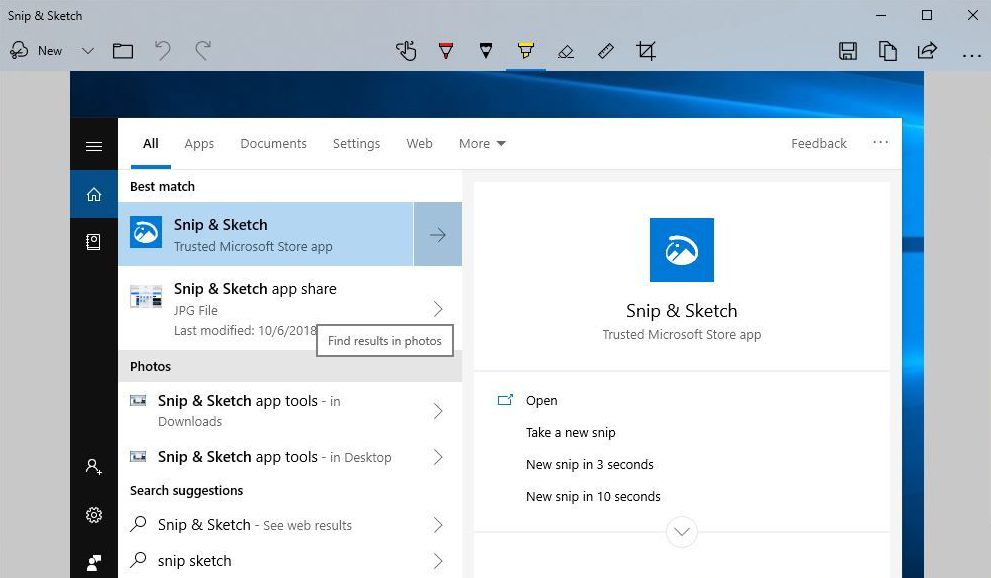
2. Snip & Sketch
You can consider Snip & Sketch as the superior version with a feature-packed, compared to the previously mentioned Snipping Tool. Snip & Sketch is by far one of the easiest ways to capture and share screenshots in Windows 10. In fact, it can also capture screenshots of a single window.
You can summon Snip & Sketch using the “Windows Key + Shift + S” keyboard shortcut. Similarly, you can also access Snip & Sketch from the Windows start menu. Now, if you are someone who regularly uses Snip & Sketch, consider pinning it to the taskbar.
3. Print Screen
If you constantly find yourself taking a snap of the entire Window, consider using the Print Screen option from Windows settings. It is often labelled as PrtScn on your keyboard. Just bear in mind, once you press the button, the screenshot would be directly copied to the clipboard. You can open any image editor and save the file accordingly.
The PrtScn button can also be used to open Snip & Sketch tool as well. In order to add the functionality, go to, Settings > Ease of Access > Keyboard. From there, under the Print Screen Shortcut, select “Use the PrtScn button to open snipping.”

4. Windows Key + Print Screen
In order to capture the entire screen and automatically save a snap, select the “Windows Key + Print Screen Key.” Once your screen goes dim, indicate that your screenshot has been successfully taken. Head over to the Pictures folder to find your recently captured screenshot.
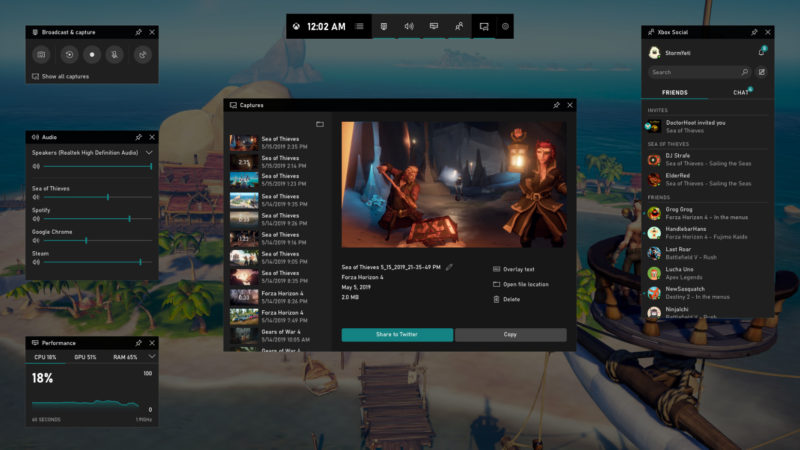
5. Game Bar
Game Bar is by far one of the most advanced screen capturing features added in Windows 10. Perfectly suitable for gamers, to capture the best moment, you can also use them to take regular screenshots as well. Select the “Windows Key + G” to summon the game bar. Now select the screenshot button to take a snap of your screen.
On the contrary, you can also add your own keyword shortcut to take a screenshot using Game Bar. Head over to “Settings > Gaming > Game Bar.” While you are at it, you can also toggle other features such as the ability to record game clips or broadcast directly using the Game Bar.
Conclusion: Take Screenshots in Windows
All the above-mentioned are the easiest ways in which you can take a screenshot in Windows 10. For everyone who wants to view Windows vertically, you can also check our article on how to rotate screen Windows 10. Let us know in the comment section below if there is any effective way to take a screenshot.


")