USB 3.0 drivers are an important part of the computer which allows you to connect USB drives to the computer. If USB 3.0 drivers are missing or outdated, you need to update or install USB 3.0 drivers on Windows 10 to ensure the normal running of the USB port.
USB 3.0 is the third latest version of the Universal Serial Bus available around the globe. It works as an interface between the various electronic peripherals and computers. Nowadays, all the devices come with inbuilt USB 3.0 drivers. It is speedy in its work and can transfer a huge amount of data within minutes or sometimes even seconds.
If the USB 3.0 drivers installed on your Windows 10 computer are outdated or missing, you won’t be able to connect any electronic device to the computer. In such a situation, you should consider installing USB 3.0 drivers on your Windows 10 computer. In this post, I will explain to you how to do so.
Also Read: 5 Best Drawing Apps for Windows 10
How to Install USB 3.0 Drivers on Windows 10
The following steps will help you to learn the easiest way to install or update USB 3.0 drivers.
Install USB 3.0 Drivers Windows 10
- Click on the Search bar present on the taskbar and type Device Manager. Click on the first result.
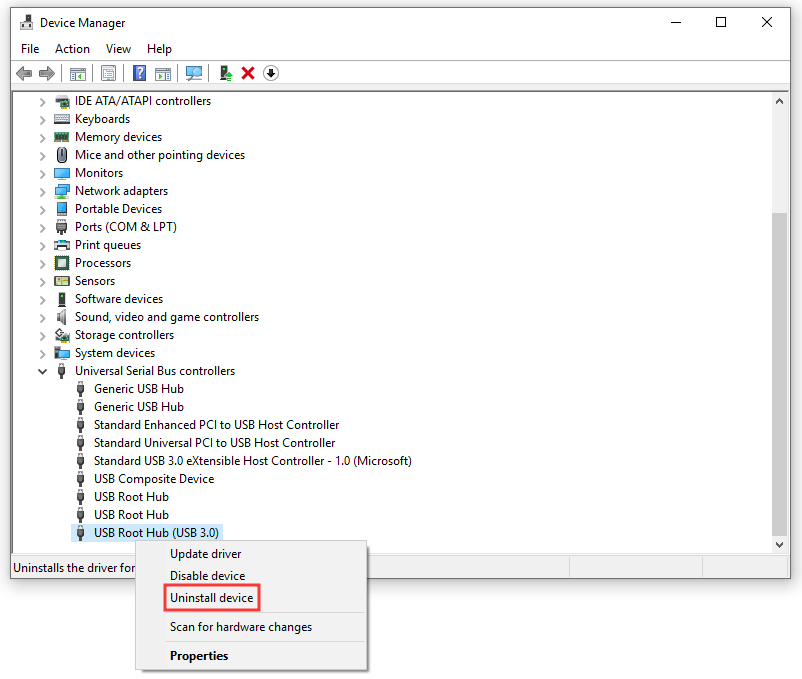
- Scroll down to find Universal Serial Bus controllers section. Click on it to expand options.
- Right-click on the USB Root Hub (USB 3.0) and select the Uninstall Device option.
- After following the above steps, close the device manager and restart your computer. By doing so, Windows will automatically install the latest version of the USB 3.0 drivers.
How to Update USB 3.0 Drivers on Windows 10
If the above method won’t help you enough to fix the issue then you can follow this method. Here in this method, I will teach you how to update USB 3.0 drivers on Windows 10.
1. Navigate to the Device Manager on Windows 10 computer.
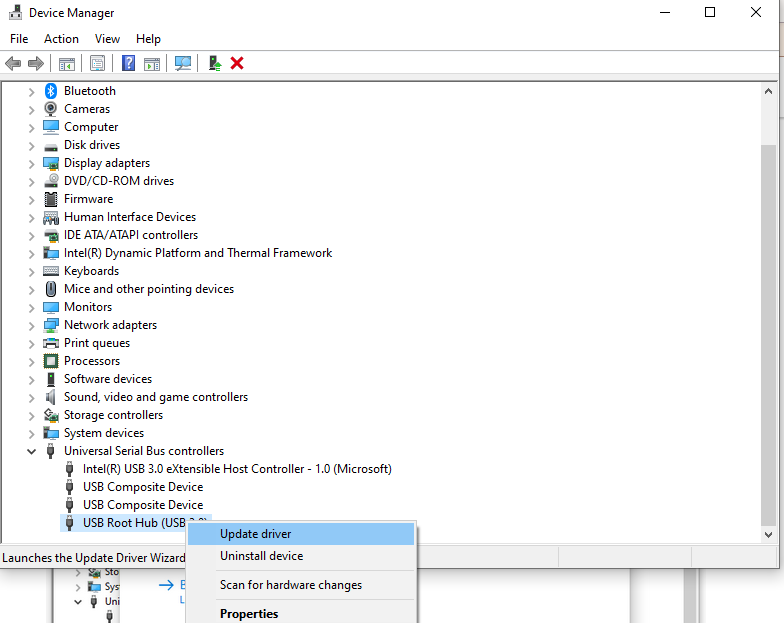
2. Similar to the above locate the Universal Serial Bus Controller and click on it to expand the list of drivers.
3. Find USB Root Hub (USB 3.0), right-click on it, and choose the Update driver option.
4. On the next screen, you will get two options to update drivers. Either you can choose Search automatically for the updated driver software or you can choose to Browse my computer for driver software.
5. We recommend you click on Search automatically for the updated driver software option. This option will automatically download and install the USB 3.0 drivers on Windows 10 computer.
Change Windows 10 USB Power Settings
If none of the above-discussed methods manages to fix the issues with the USB 3.0 then this is the last method you can give a try. Here, you have to change the power settings of the USB driver 3.0. As a result of improper power settings, you might face issues with the USB driver 3.0. Here are the steps you should follow to change the Windows 10 USB power settings.
1. Navigate to the Device Manager on your Windows 10 computer.
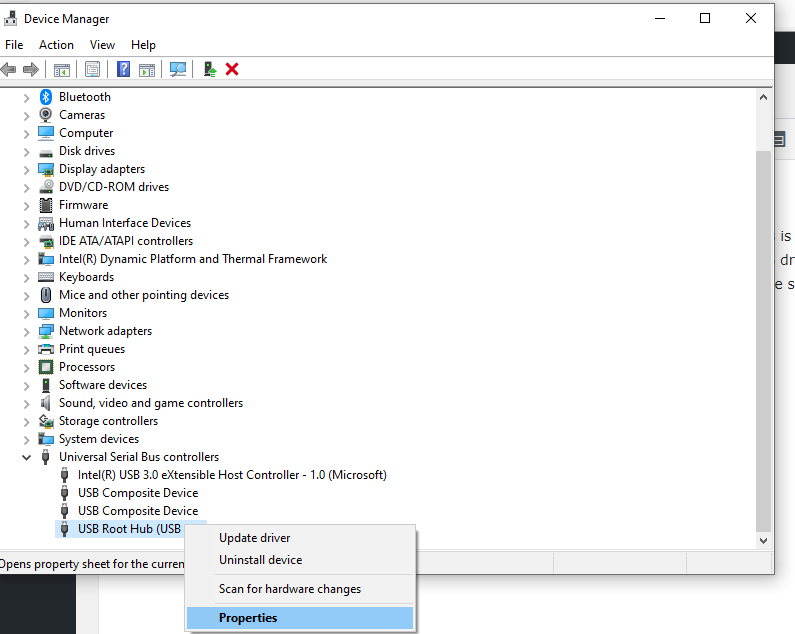
2. Scroll till you can’t see Universal Serial Bus Controllers. Click on it and expand the list.
3. Now, right-click on the USB Root Hub(USB 3.0). This time select the Properties option.
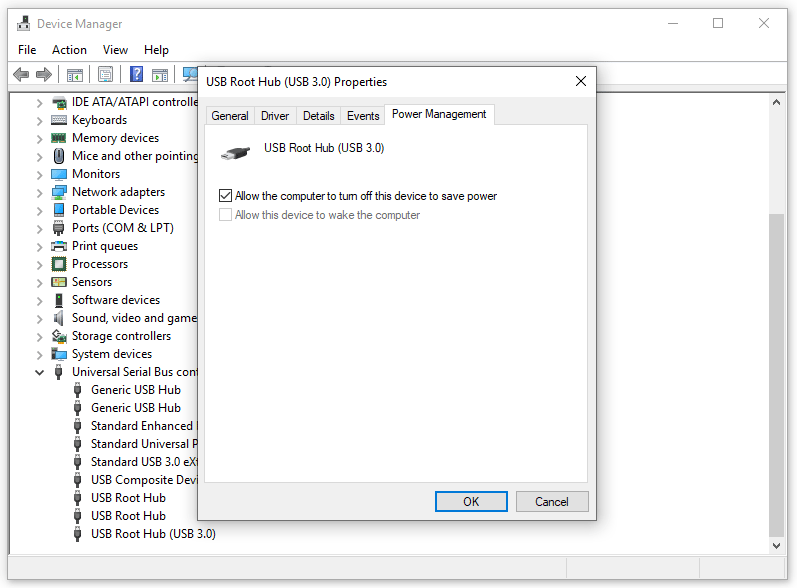
4. On the tab’s sections, click on the Power Management.
5. Mark the checkboxes available before the Allow the computer to turn off this device to save power.
6. Lastly, click on the OK button and close the device manager. You should restart your computer to check whether the issue got resolved or not.
You may like: What is Windows Modules Installer Worker and How to Fix its High CPU Usage?
Ending Words: Install USB 3.0 Drivers Windows 10
USB 3.0 drivers are an essential part of the computer and should be regularly, otherwise, you may face difficulties while connecting various latest generation devices to the computer. If you encounter any issue then you can take benefit of the methods we have discussed so far to resolve it. Hopefully, our today’s informative post on how to install USB 3.0 drivers on Windows 10 helped you enough.


