There are many instances when your headphones are not recognized by your Windows 10 computer. Any problem related to computer hardware to software can cause headphones not working in Windows 10 issue. This is the commonly seen Windows 10 error. If you also facing the same error, then this post is specially written for you.
Here in this post, I will explain some easy methods to fix headphones not working in Windows 10 issue.
Also Read: Top 10 Best AirPods Pro Cases You Can Buy
Fix Headphones Not Working in Windows 10
Before talking about the solutions, you should check whether the problem is related to the software or hardware. If the problem is related to the hardware then the following solutions might not able to fix the issue.
1. Restart Computer
Although this solution doesn’t seem like a solution but still helped many users to fix the headphone not working issue. All you have to do is plug in your headphones and restart your computer. After that, check whether your headphone is started working or not. If not, then we would suggest you proceed to the next solution.
2. Make Sure Headphones are Enabled
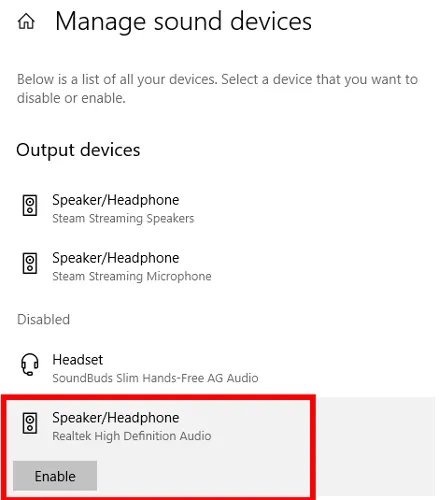
Sometimes Windows operating system may disable the headphones that can prompt headphones not working issue. In such cases, you need to make some changes in Windows settings to enable them. To do so go through the following steps.
1. Right-click on the speaker icon located in the notification area.
2. Click on the Sound Settings.
3. On the next screen, tap on the Manage sound devices option.
4. If you see headphones under the disabled menu then click on them and choose Enable.
3. Set Headphone as Default Playback Devices
This is also one of the reasons for the headphone not working issue. If the above solutions don’t work for you then, you should set headphones as default playback devices on Windows 10.
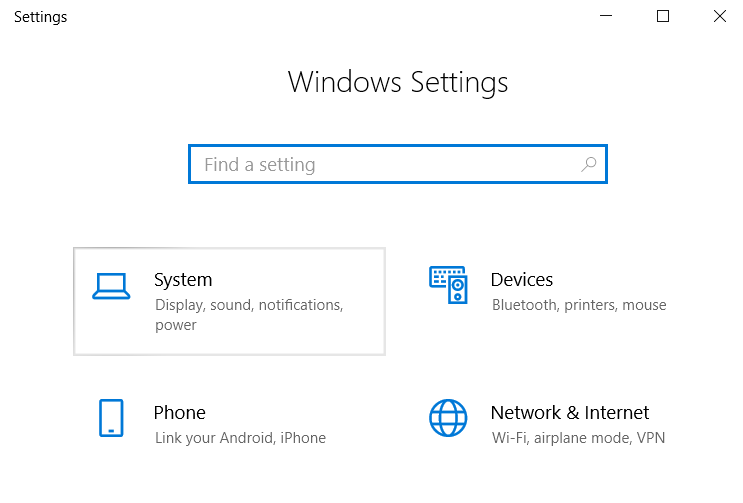
1. Navigate to the Windows Settings. You can do so by pressing Windows + I.
2. From Windows settings, tap on the System button.
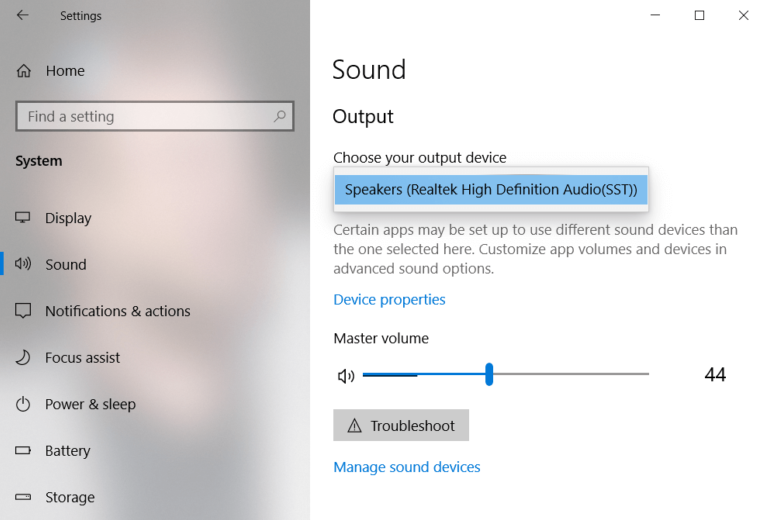
3. Click on the Sound tab, located in the left sidebar.
4. Now click on the Manage sound devices.
5. From the output devices dropdown list, choose your headphones.
Also Read: No Sound on Computer? Here’s How to Fix it!
4. Update Windows 10 Sound Drivers
If you have started facing headphones not working problem after updating your Windows operating system then probably the new update isn’t compatible with installed sound drivers. In such a case, you should think about updating your sound drivers. Here is how to update sound drivers on Windows 10.
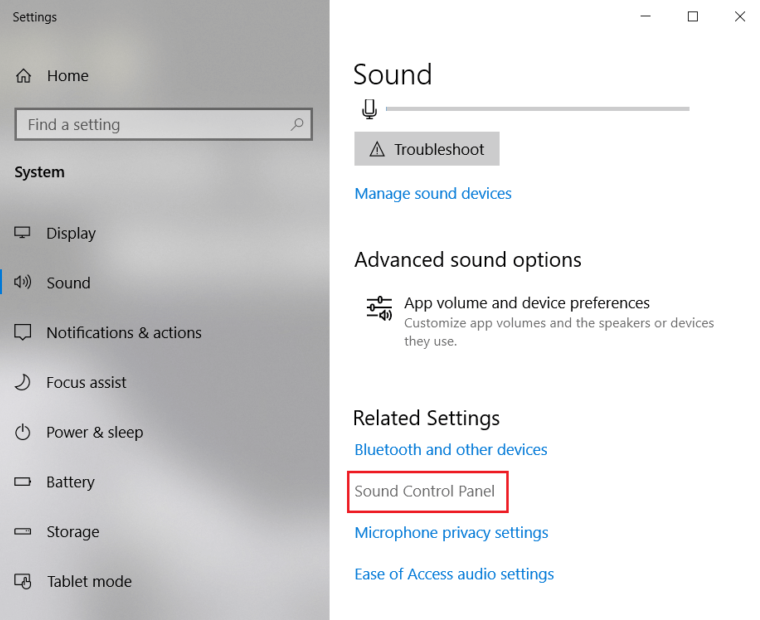
1. Open Sound Settings by right-clicking on the volume button.
2. Click on the Sound control panel located under the Related Settings.
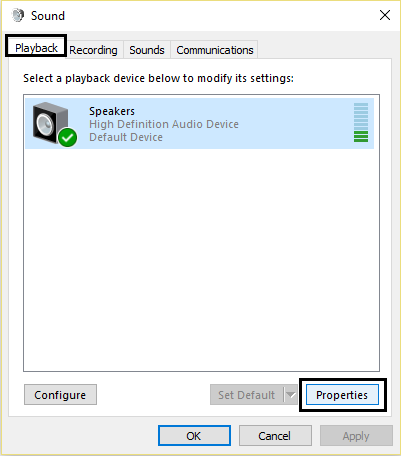
3. Choose the Playback tab.
4. Select Speakers followed by clicking on the Properties button.
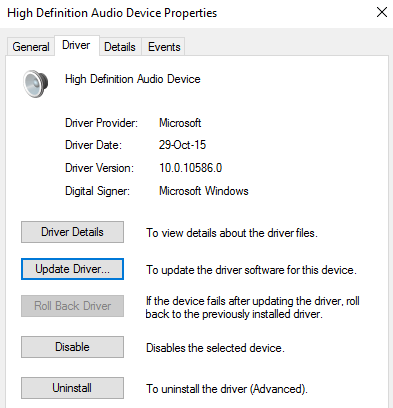
5. Again click on the Properties tab available under the Controller information.
6. On the next screen, click on the Change Settings option.
7. Switch to the Drivers tab and tap on the Update Driver option.
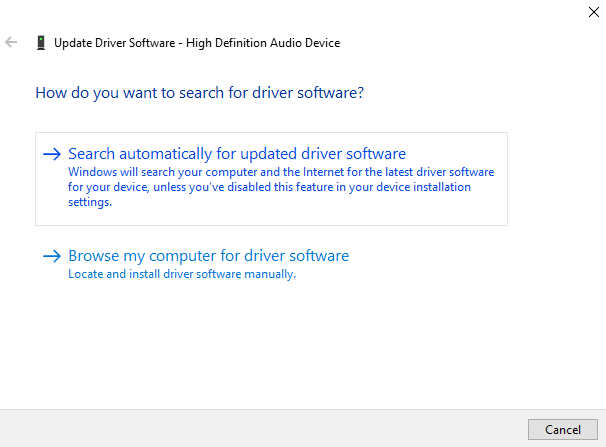
8. Now Windows will ask your preferred way to update drivers. In our case, we will click on the Search automatically for updated driver software.
Wait for some time until Windows update and install the latest version of the driver software. After that, plug in your headphones and check whether your headphones not working Windows 10 issue got resolved or not.
Also Read: Bluetooth Speaker Not Connecting to PC? Here’s how to Fix.
Final Take: Fix Headphones Not Working Windows 10
If none of the above solutions delivers the desired outcomes, then probably your computer’s hardware is responsible for the headphones not working issue. We would suggest you take your headphone and computer to the service centre.
Hopefully, this article helped you enough to fix the headphones not working in Windows 10 issue. If you still have any doubts then don’t hesitate to share with us.

