This goes without saying, since the era of Windows XP, screensavers have been a part of every Windows users’ life. Even there was a time when the perfect pass time was fidgeting around various screensavers. Fast forward to Windows 11, and Microsoft has managed the retain the screensaver.
Although the craze for using screensavers might be long gone, there are still a fraction of users using the same. This article is dedicated to those users on how to enable and set up your screensaver in Windows 11.
Also Read: What is the ‘Focus Sessions’ Feature on Windows 11?
How to Enable Screensaver on Windows 11
Screensaver is disabled out of the box in Windows 11. Follow the steps down below to enable screensavers on your PC.
How to Enable Screensaver on Windows 11
- Start with clicking the ‘Start Menu’ and open the ‘Settings’ option. Similarly, you can also use the ‘Windows + I’ shortcut to open up Settings.
- At the left sidebar, select ‘Personalization.’ Now click on ‘Lock Screen’ to further expand the option for screensaver.
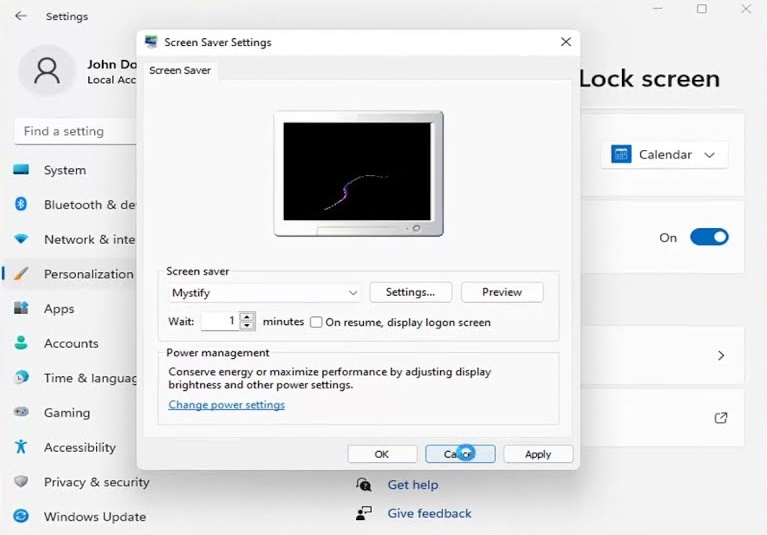
- Right at the Lock Screen settings, select the ‘Screen saver’ option to continue.
- Now your screensaver display window will slow up. You can make necessary changes to further customize your screensaver.
Note: For the most part, Microsoft has kept the screensaver window similar since XP.
How to Change Various Screensaver Options
Right out of the box, there aren’t a ton of customization options with the screensaver. Mostly you are left with Black, Ribbons, Bubbles, and Mystify. That being said, you can click on the ‘Settings’ options to further tinker with your screensaver. Here are some of the most commonly used customization options for screensavers.
1. Use 3D Text Screensavers
Using the 3D Text Screensavers, you have complete control over how your screensaver would look and feel. Click on the ‘Settings; option and you can add ‘Custom Text.’ Similarly, if you want, you can also showcase ‘Time’. Head over to ‘Choose Font’ and you can work with a specific font.
Some of the other options include making fine adjustments to the Motion. You can determine the Rotation Speed, the overall Resolution, and the Surface Style. Experiment with the various options and choose the one that suits your preference.
2. Try Out Photos Screensaver
Just like before, you can also use Photos as a screensaver in Windows 11. Right after selecting ‘Settings’ browse through your folders and choose the photos you want to use. Windows can use multiple photos from the folder and use them as a slide show for your screensaver.
You can also customize the slide show. Choose among slow, medium, and fast, and Windows will switch to the next picture accordingly. Instead of depicting them in order, you can also randomize. Simply tick on the checkbox ‘Shuffle pictures.’
Concluding Words
So that was our curated guide on how you can use a screensaver in Windows 11. Changing screensaver could have never been easier before. Do You Still Use Screensaver on Your Windows Machine? Let us know in the comment section below.


")