There are a plethora of apps, including UWP (Universal Windows Platform) and third-party that use the built-in video platform in Windows 10. As for the UWP apps, these are the one that comes pre-loaded with the OS including Movies & TV, Photos, and more.
Similarly, Netflix and Amazon Prime are third-party apps that use the Windows video platform. Users can change the video playback settings to get the optimum results, in order to enhance their overall viewing experience.
So, it is very important to have a clear understanding of the tools, and how Windows 10 can deliver optimum video quality. In this article, we are going to discuss some of the integral video playback settings for both PC and laptop.
Read: How to Upgrade Windows 10 to Windows 11 for Free
Change Your Video Playback Settings in Windows 10
Predominantly users can change the video playback settings in two different ways for Windows 10. These includes:
1. Use Windows Settings App
By making certain changes through the Windows Settings app, you can expect better video output. Prior to making the changes, follow the steps to navigate to the video playback option:
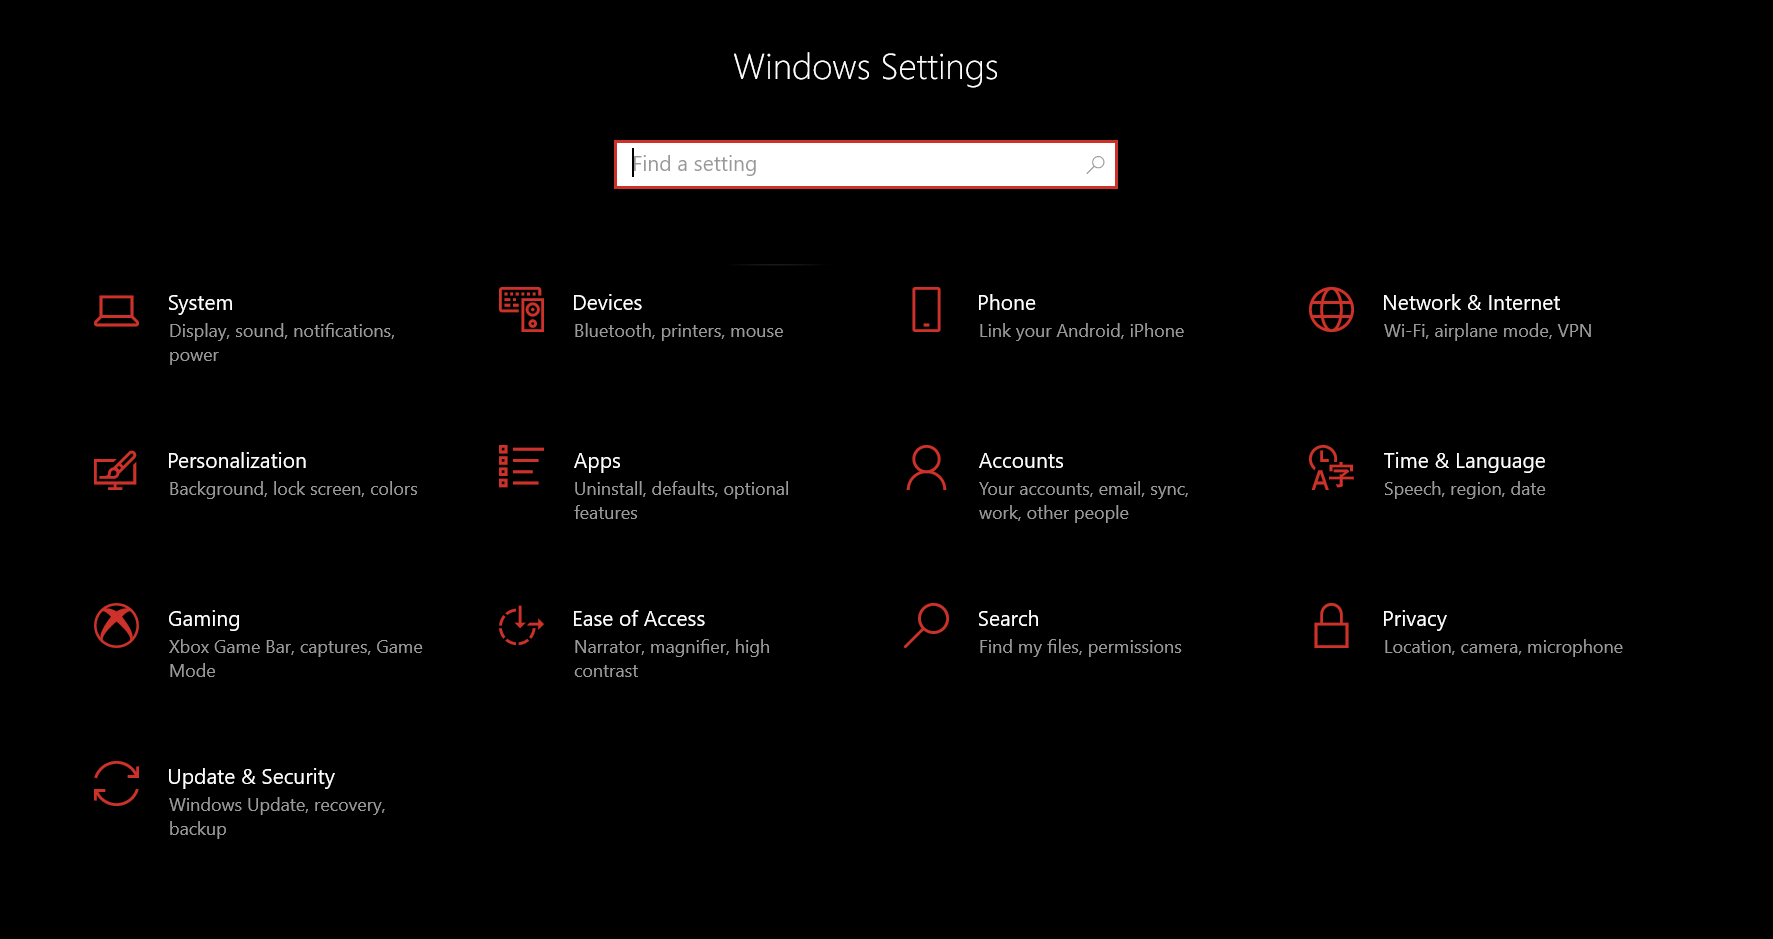
Step 1: Right-click on the Start menu or simply press the Windows key to open the Settings.
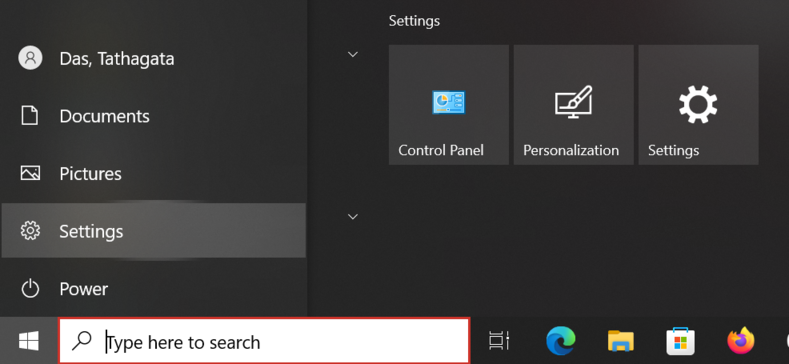
Step 2: From the Settings window, go to the Apps section.
Step 3: Click on the Video Playback option within the Apps window.

That was halfway through the process of accessing the Video playback section. Now, we need to tweak the default options to get optimum results. Bear in mind, these changes are applicable for Windows 11 as well.
A. HDR Settings
The HDR option allows enhancing the overall video quality. But, this functionality is often limited to certain laptops and computers. In case you are unable to find the option, your device is not compatible with HDR. Here’s how you can check HDR if it is compatible with your system.
Step 1: Head over to the Windows HD Color settings option.
Step 2: You can also switch your display, based on your requirements.
Step 3: Right below the display option, there is a separate section named, Device Capabilities. This will provide you with all the information you need for the display.

That’s how you can change the HDR settings and adjust them based on your device capabilities.
B. Lower Resolution Settings
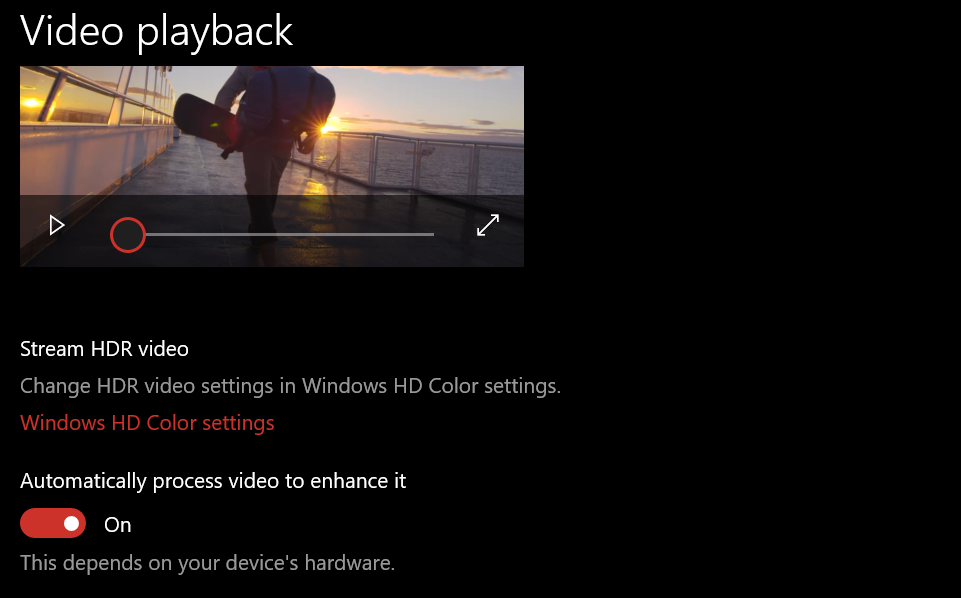
If you want to enhance the video output, you can also enable, the ‘Automatically process to enhance it’. This option makes the best use of your hardware to enhance the video quality. Primarily it uses the GPU to enhance the video processing.

For anyone running in metered data, you can also play your videos at lower resolution. This comes in handy if you want to save some network bandwidth. Click on the checkbox, ‘I prefer video to play at a lower resolution’. Although it is not a mandatory one. So, you can always stick to ‘Automatically process video to enhance it.’
C. Battery Optimization
Predominantly battery becomes the biggest concern for anyone using a laptop. In fact, there are certain programs and applications that can drain your battery in no time. You can reduce the battery percentage falling drastically, by making subtle changes in the video playback settings.

The same steps are applicable for Windows 11 as well. Under the Battery options, select the drop-down option that suggests, ‘Optimize for battery life.’ Maev down a little further and you can find another feature to enhance your battery life.
Click on the checkbox, ‘I prefer video to play at a lower resolution when on battery.’ This way, you can churn out a few more hours out of your device battery.
Read: 6 Things You Can Try If Windows 10 Fails to Start
Troubleshoot Video Playback Problems in Windows 10
Up until now, we discuss the video playback settings you can adjust to make videos run well. But, there are several instances when the underlying issue pertains to the hardware. Here’s an easy troubleshooting fix that you can try out for video playback errors.
1. Change Your Monitor’s Refresh Rate
If you are rocking a higher refresh rate monitor, it can also affect your video quality. Using incorrect refresh rate settings can hinder video playback in Windows 10. Here’s how you can adjust refresh rate on your monitor in Windows 10.
Step 1: Press the Windows Key to bring the Start Menu and select Settings.
Step 2: Look for System on Settings.
Step 3: Click on Display from the left pane of System settings. Although Display is going to appear by default. Scroll down until you find ‘Advanced display settings.’

Step 4: From the Advanced display settings, you can pick the monitor with the higher refresh rate. Scroll down until you find the drop-down menu under Refresh rate. If it’s set to 60Hz by default, change it accordingly.
2. Reinstall Your Display Driver
If you are still having a hard time getting better video quality, try reinstalling your display driver. Search for Device Manager in the Windows start menu. Now expand the Display adapters category.

Right-click on the display driver and pick Uninstall device. Once you have successfully uninstalled the driver, restart your computer. You can also pick the Roll Back Driver option if present for your driver. You can also read about best driver updater tools for help.
Video Playback Settings – FAQs
1. How to change the default video player in Windows 10?
Press the ‘Windows Key + I’ to open the Settings menu. Now go to Apps > Default apps. In the default apps menu, look for the Video player. That being said, once you click on the default video player, you will get an entire list of all the available video players. Select the one you prefer to use.
2. How to fix video playback issues?
One of the easiest fixes with the video playback issue is via troubleshooter. Simply type in troubleshooters in the search bar. Go to the Troubleshoot settings, and click on Additional Troubleshooters. Scroll down until you find the Video Playback.
3. How to fix ‘can’t run videos’ in Windows 10?
For the majority of the time, if you are unable to run video, the underlying issue pertains to a broken driver. Try uninstalling and reinstalling your display driver for Windows 10 PC. Oftentimes, this would get you up and running in no time. While you are at it, you can also update the remaining drivers, and try checking whether you are able to run video or not?
You may also like: How to Factory Reset Windows 10
Concluding Words
So that was our curated guide on some of the best video settings you can make to get the best quality output. If you prioritize battery life, you can also change the settings accordingly. So, let us know in the comment section below, were you able to make relevant changes for the best video quality?


")