Ever found yourself busy enough that you’re unable to attend important calls? If yes, you’ve reached the right place. Today, I will share how to set up voicemail on your Android phone easily.
If you are new to this term, let me tell you voicemail is just a voice message that caller leaves when the person is absent or simply unable to take calls. Unlike a traditional answering machine, here the voice doesn’t store in a machine. Instead, it is stored on the service provider’s server.
Just like your Gmail account has some space reserved for storing your emails, the voicemail user also has some space reserved in his/her voice mailbox account. So, without any further ado, let’s come straight to the point.
Read: 8 Best Notification Apps For Android
How to Set Up Voicemail on Android?
1. Carrier Voicemail
If you want to use the voicemail service provided by your carrier, just follow the steps below to set up basic voicemail on your Android smartphone. It won’t take more than a couple of minutes to configure it correctly.
Due to different versions of Android and carriers, the process may differ from device to device, but the basic concept will always be the same.
First of all, go to Call Settings on your phone. You can find this option under Settings or in the Settings of your dialer app.
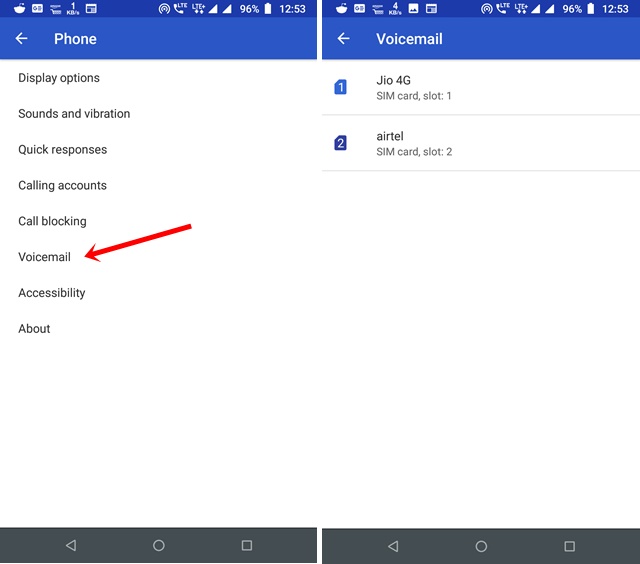
Tap on Voicemail > Select SIM Card (if you’re using multiple SIM Cards) > Choose ‘Your carrier’ as service for your operator.
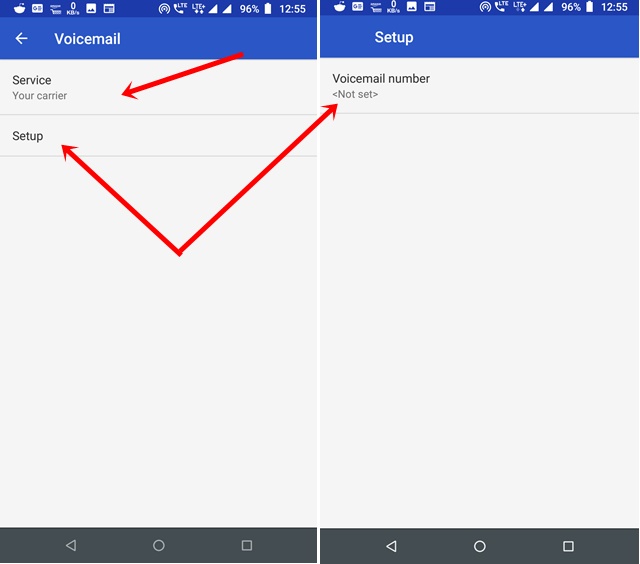
Moving to another option — Setup and enter the voicemail number. If you are not sure, just call the customer care and ask for this number. It’s pretty easy.
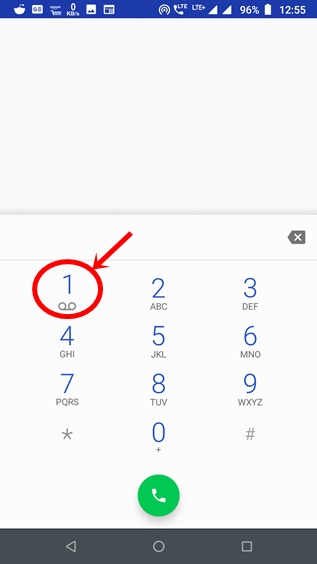
Now, open the dialer app and tap & hold the ‘1’ key until your phone calls the voicemail service.
Once connected, enter the PIN or password when prompted by the voice command. Then, Record your name, choose the default greeting message and follow the steps carefully. That’s it. Your voicemail service is now configured.
2. Google Voice
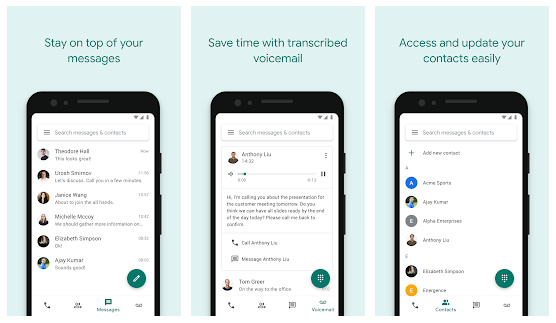
Google Voice is one of the most popular services that gives you a phone number for calling, text messaging and voicemail. As it works on smartphones and computers, you can sync all the data across your devices. Google Voice is best for both personal and office use.
Talking about the features, all the calls, text messages and voice mail are automatically backed up so that you access them whenever you want. Google Voice also provides advanced voicemail transcriptions in the app and/or have sent to your email. The automatic spam filter works really good by blocking numbers you want to avoid. Just follow the steps below to set it up on your Android phone.
NOTE: Google Voice only works for personal Google Accounts in the US and G Suite accounts in selected markets. Text messaging is not supported in all markets.
How to Set Up Google Voice on Android?
- First of all, install the Google Voice app from the Play Store or App store depending upon your device. It’s completely free.
- Once download and installation are finished, open the app and sign in using your Google Account.
- Then, Accept the terms and conditions and proceed.
- Now, the app will ask you to choose a number. Tap search and filter the numbers by city or area code. If you are unable to find a number in your preferred area, try somewhere nearby.
- After selecting the number, you’ve to verify your existing number. Tap Next to enter the number.
- Once done, tap Send Code to receive a code and complete the verification process. It’s quite simple.
- That’s it. Your Google Voice account is ready to use. You can use it to call, text message and voicemail services easily.
Also Read: 7 Best Call Recorder Apps For Android
Which method do you prefer to Setup Voicemail on Android?
I hope you found the article useful. Voicemail is a very convenient way to store messages for people who are in meetings regularly or doesn’t have time to answer the phone all the time. You can go with any of the methods explained above based on your requirements. While the first one is for basic usage the later comes with many useful options. So, which method you prefer to configure voicemail on your Android device? Do let us know in the comments below.


")